Food
Valentine Chocolate Covered Oreo Pops Recipe

Jan
Confession. Pink is one of my favorite colors. So you know I love all things Valentine’s Day.
For example, I LOVE this layered pink ombre cake – it’s strawberry flavored and adorable. And why make a regular hot chocolate bomb when you could make pink hot chocolate bombs like these?
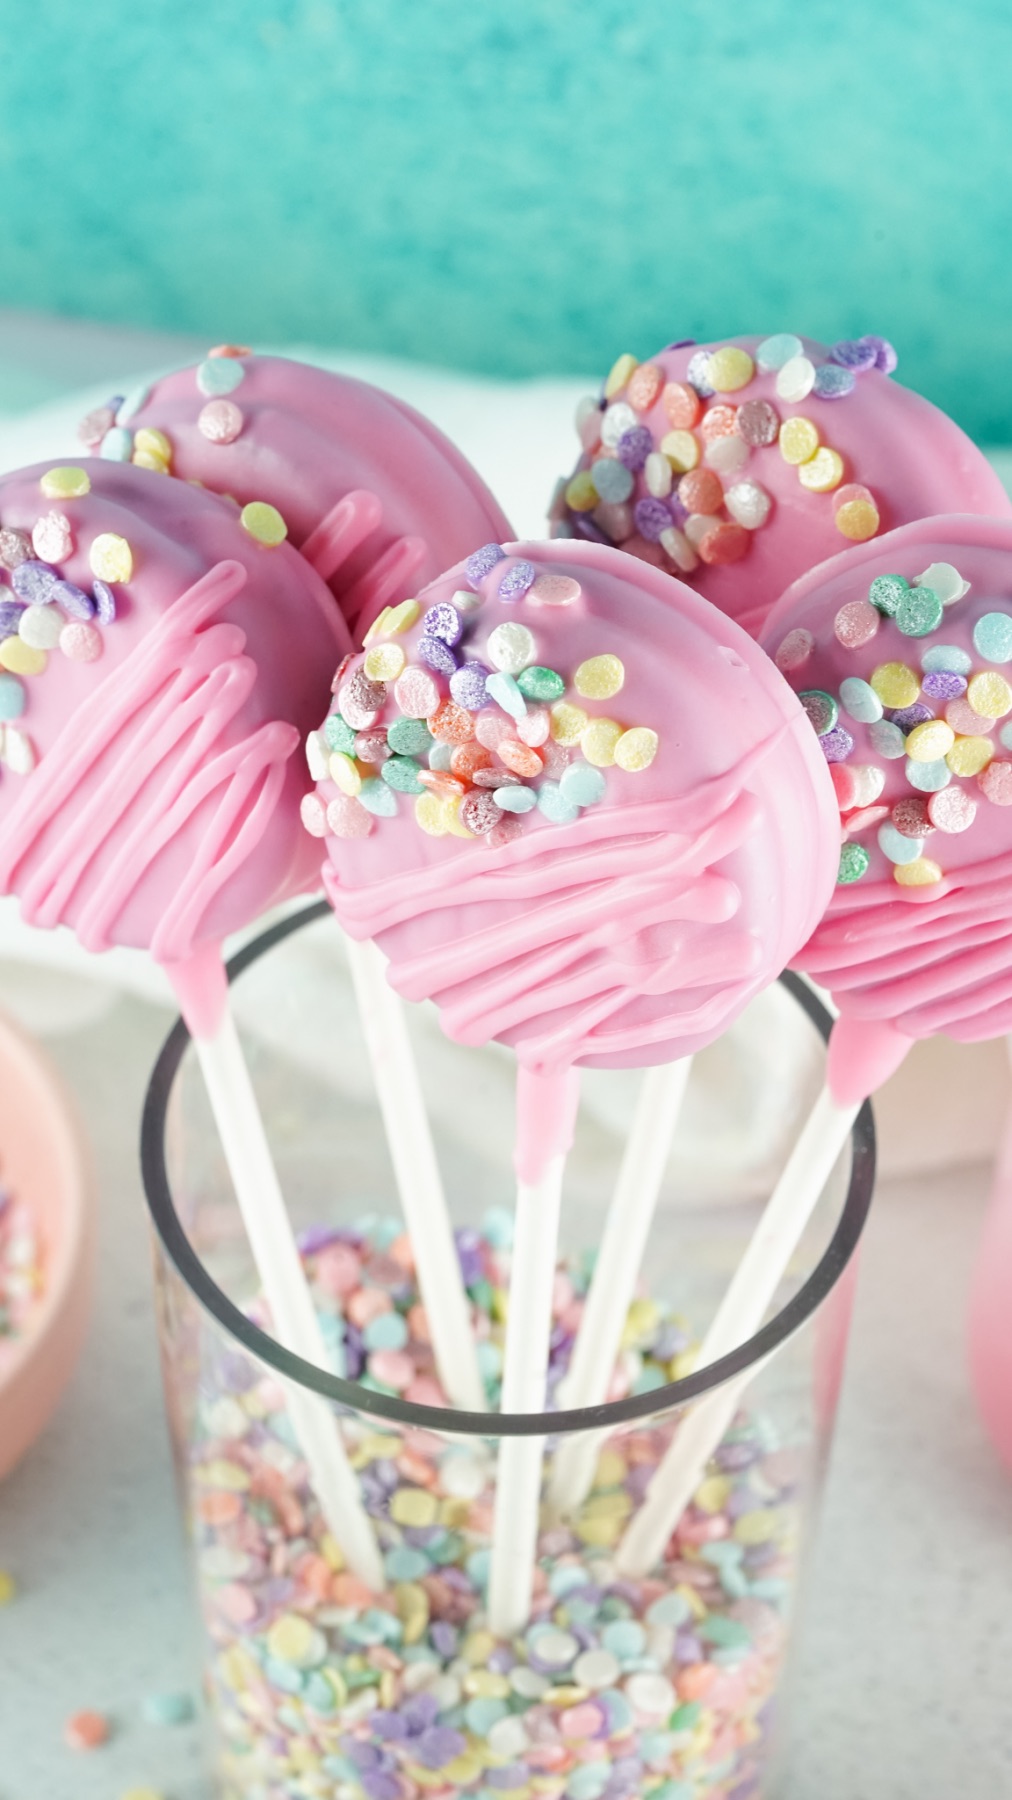
But what I really love about these Chocolate Covered Oreo Pops is that they make great gifts. They are perfect for co-workers and classrooms. And they are also half the work because you are working with pre-made cookies! So let’s make them.
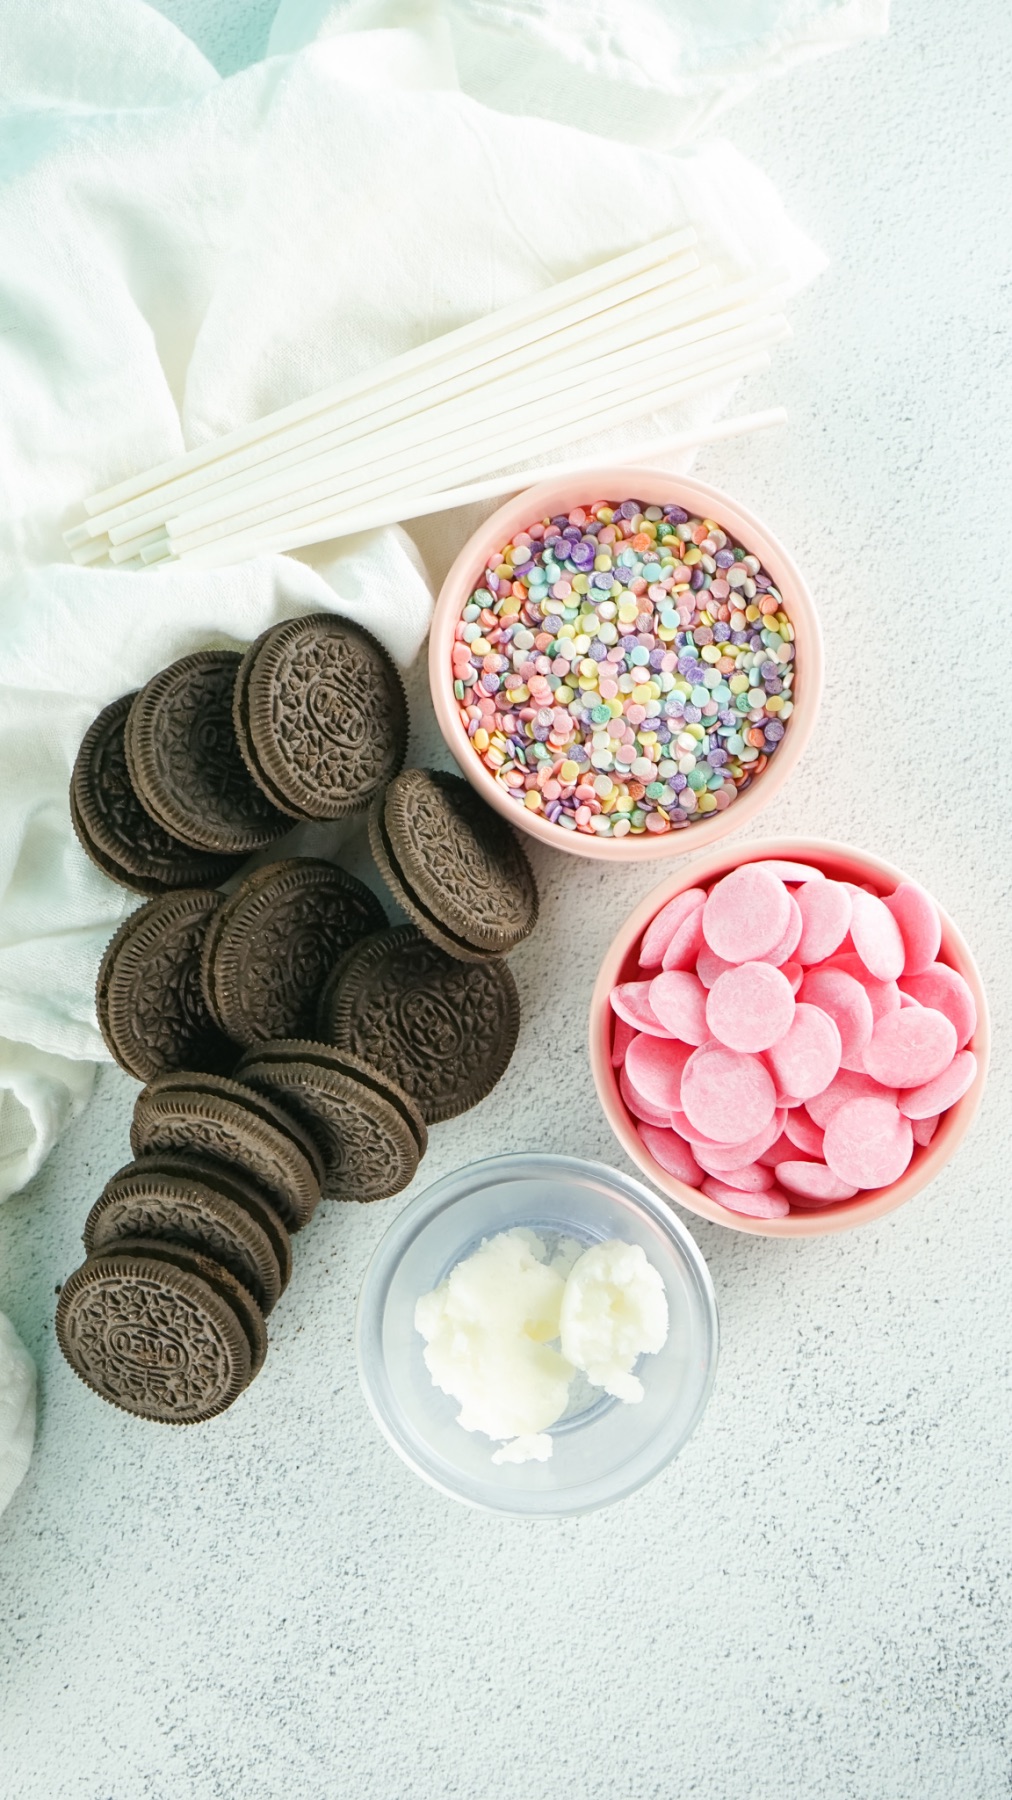
Ingredients to Make Chocolate Covered Oreo Pops
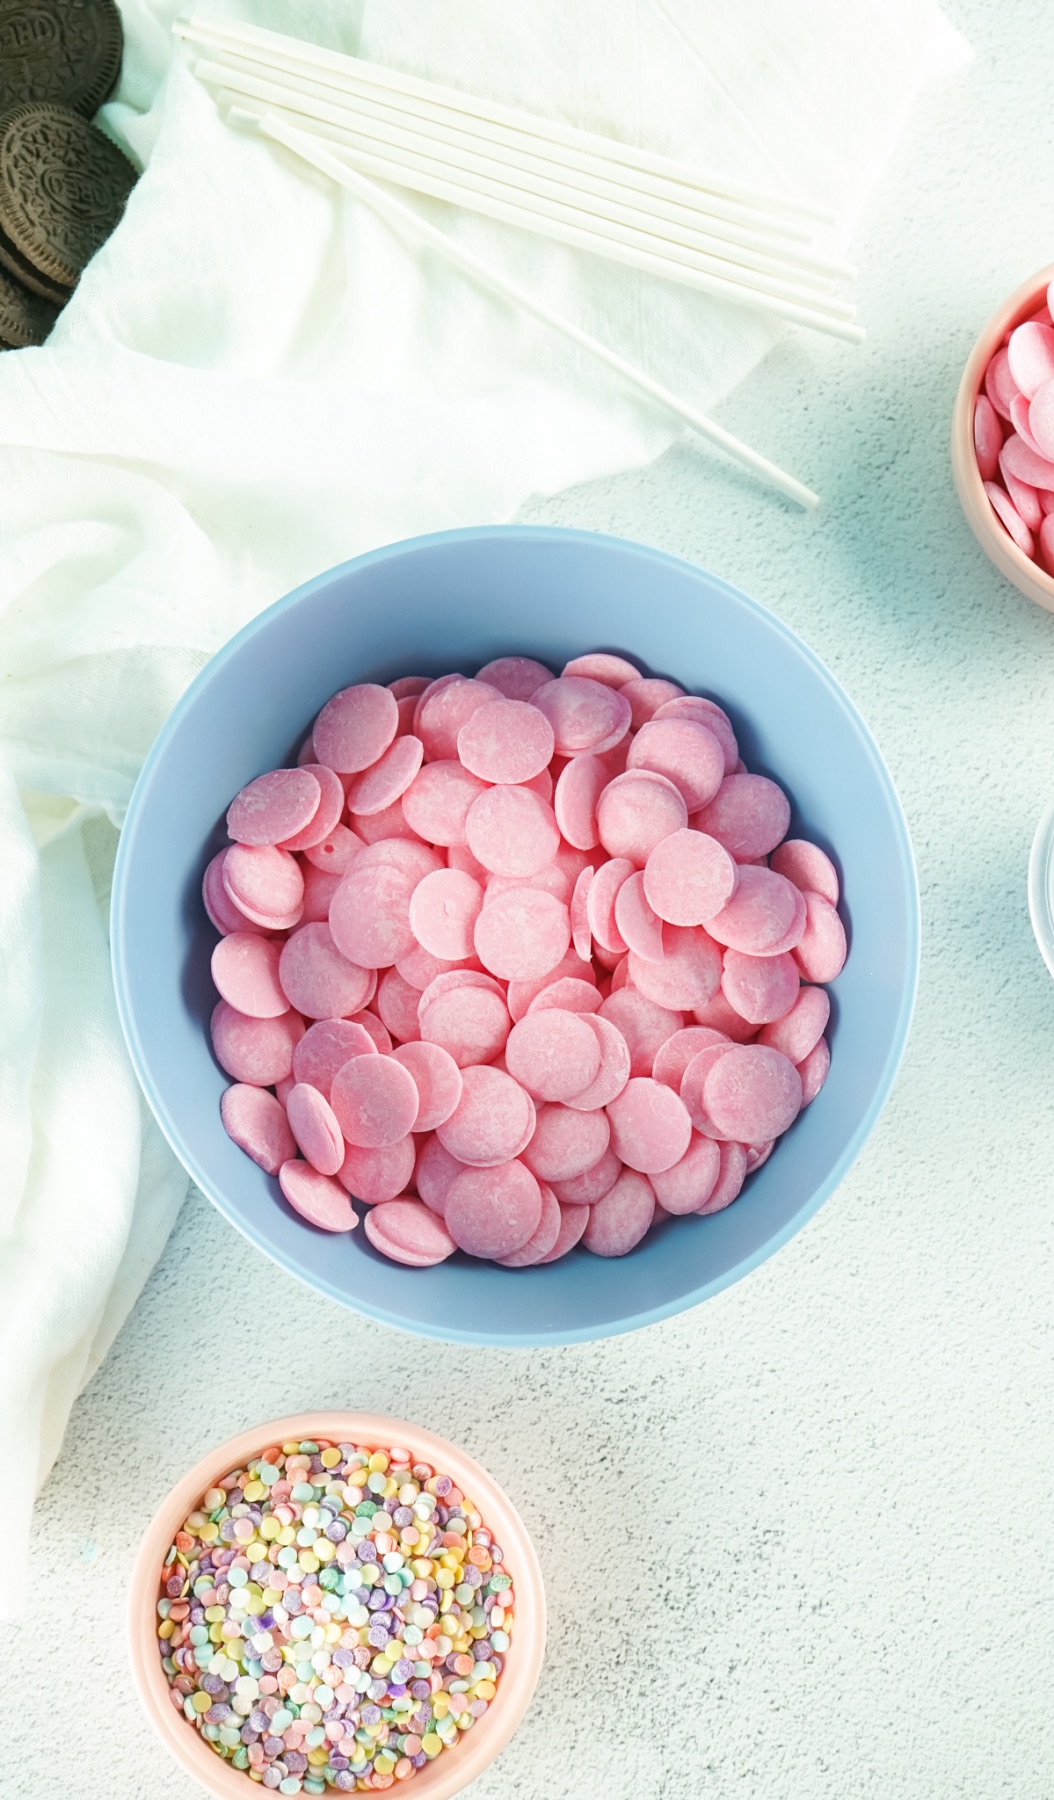
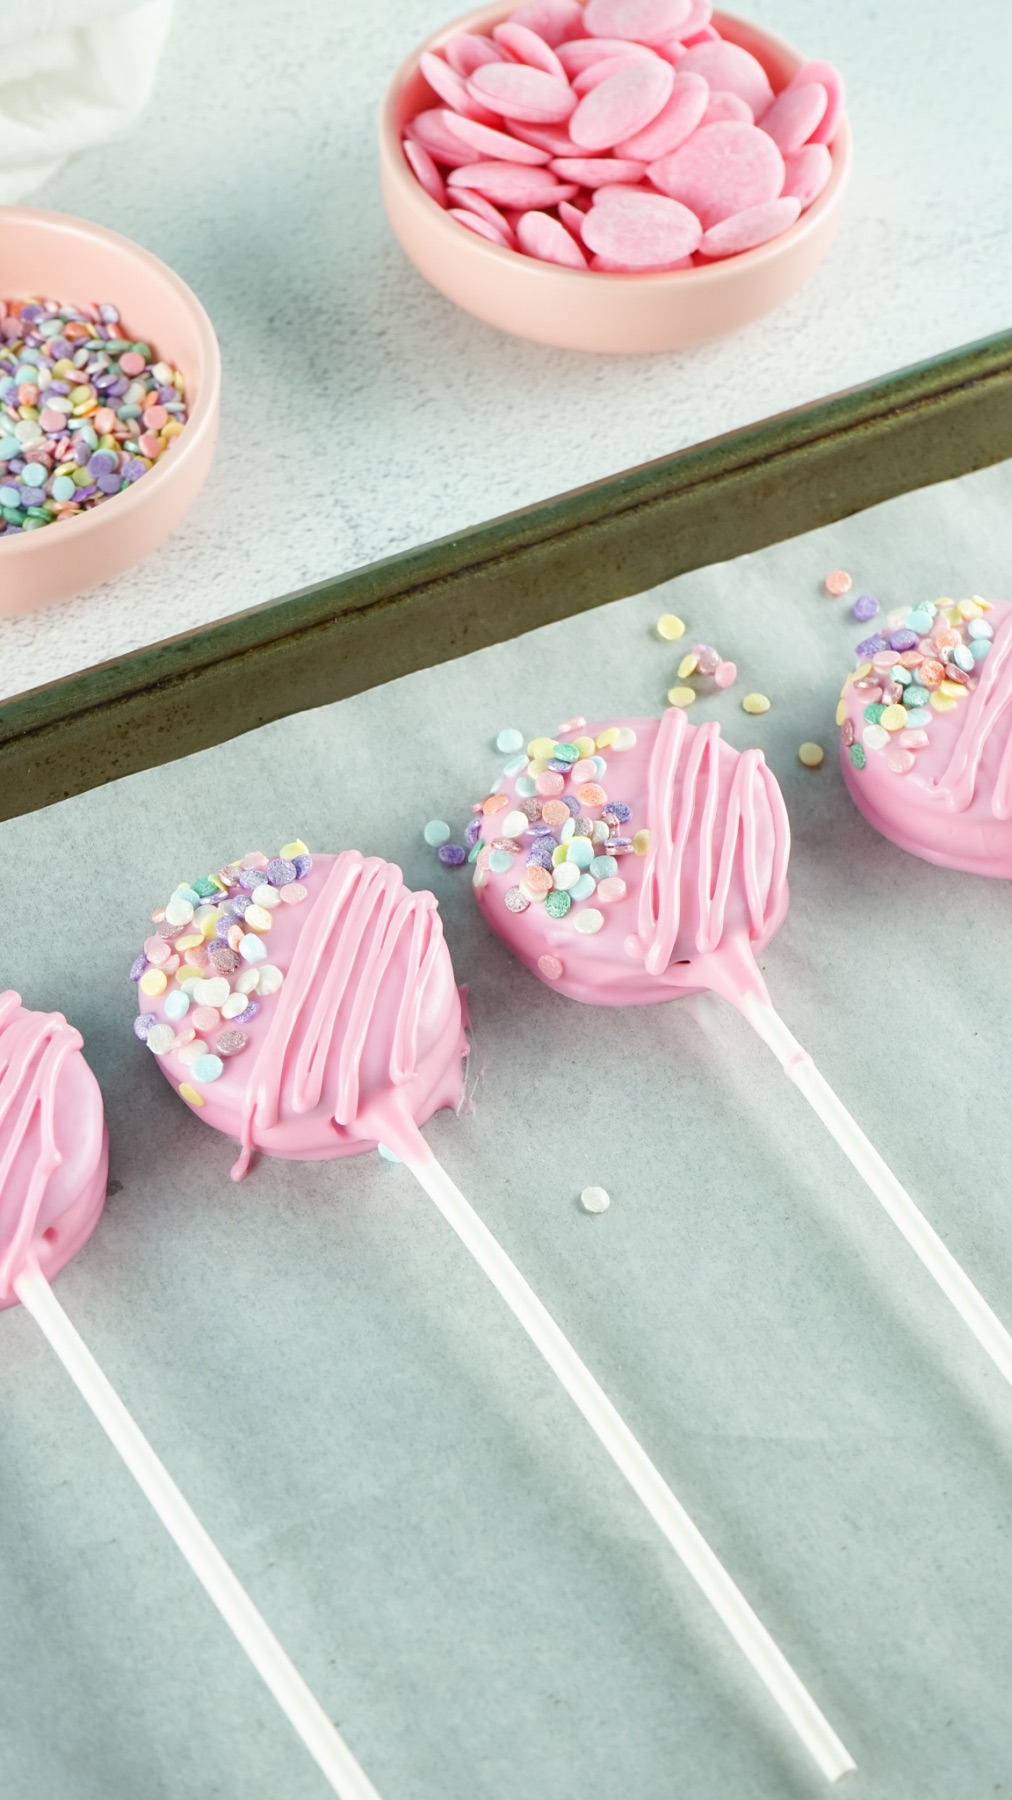
The ingredients to make these Chocolate Covered Oreo Pops are simple. All you need is pink melting chocolate (or white chocolate and food dye), a small amount of coconut oil, rainbow pastel sprinkles, and Oreos.
You can use any kind of Oreo you like. You can use regular Oreos, Double Stuff Oreos, or Oreo Thins. Although Oreos with less frosting are harder to to open without breaking them. More on that later!
Kitchen Supplies to Make Chocolate Covered Oreo Pops
You definitely need a few more supplies than ingredients. To make these, you will need lollipop sticks, parchment paper, a piping bag, scissors, a bowl for melting your chocolate, and a tall cup for dipping your Oreos. I’ll talk you through all of these supplies along the way.
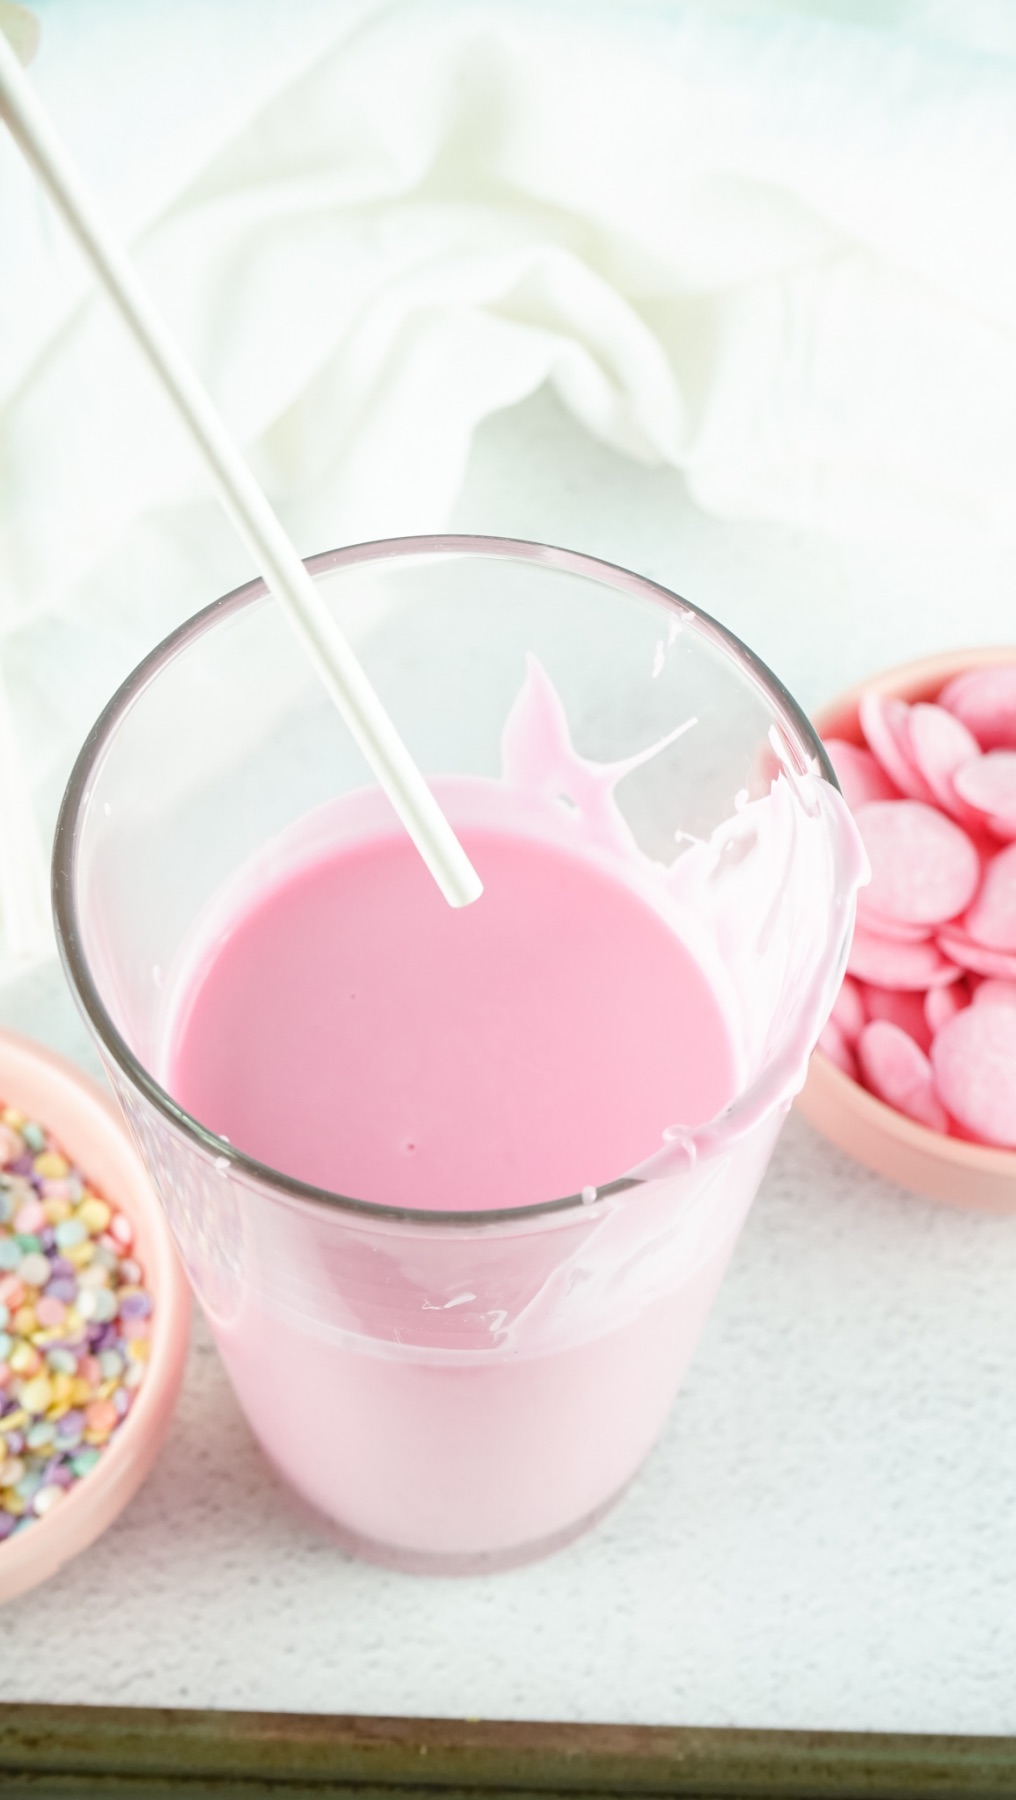
How to Temper Pink Chocolate
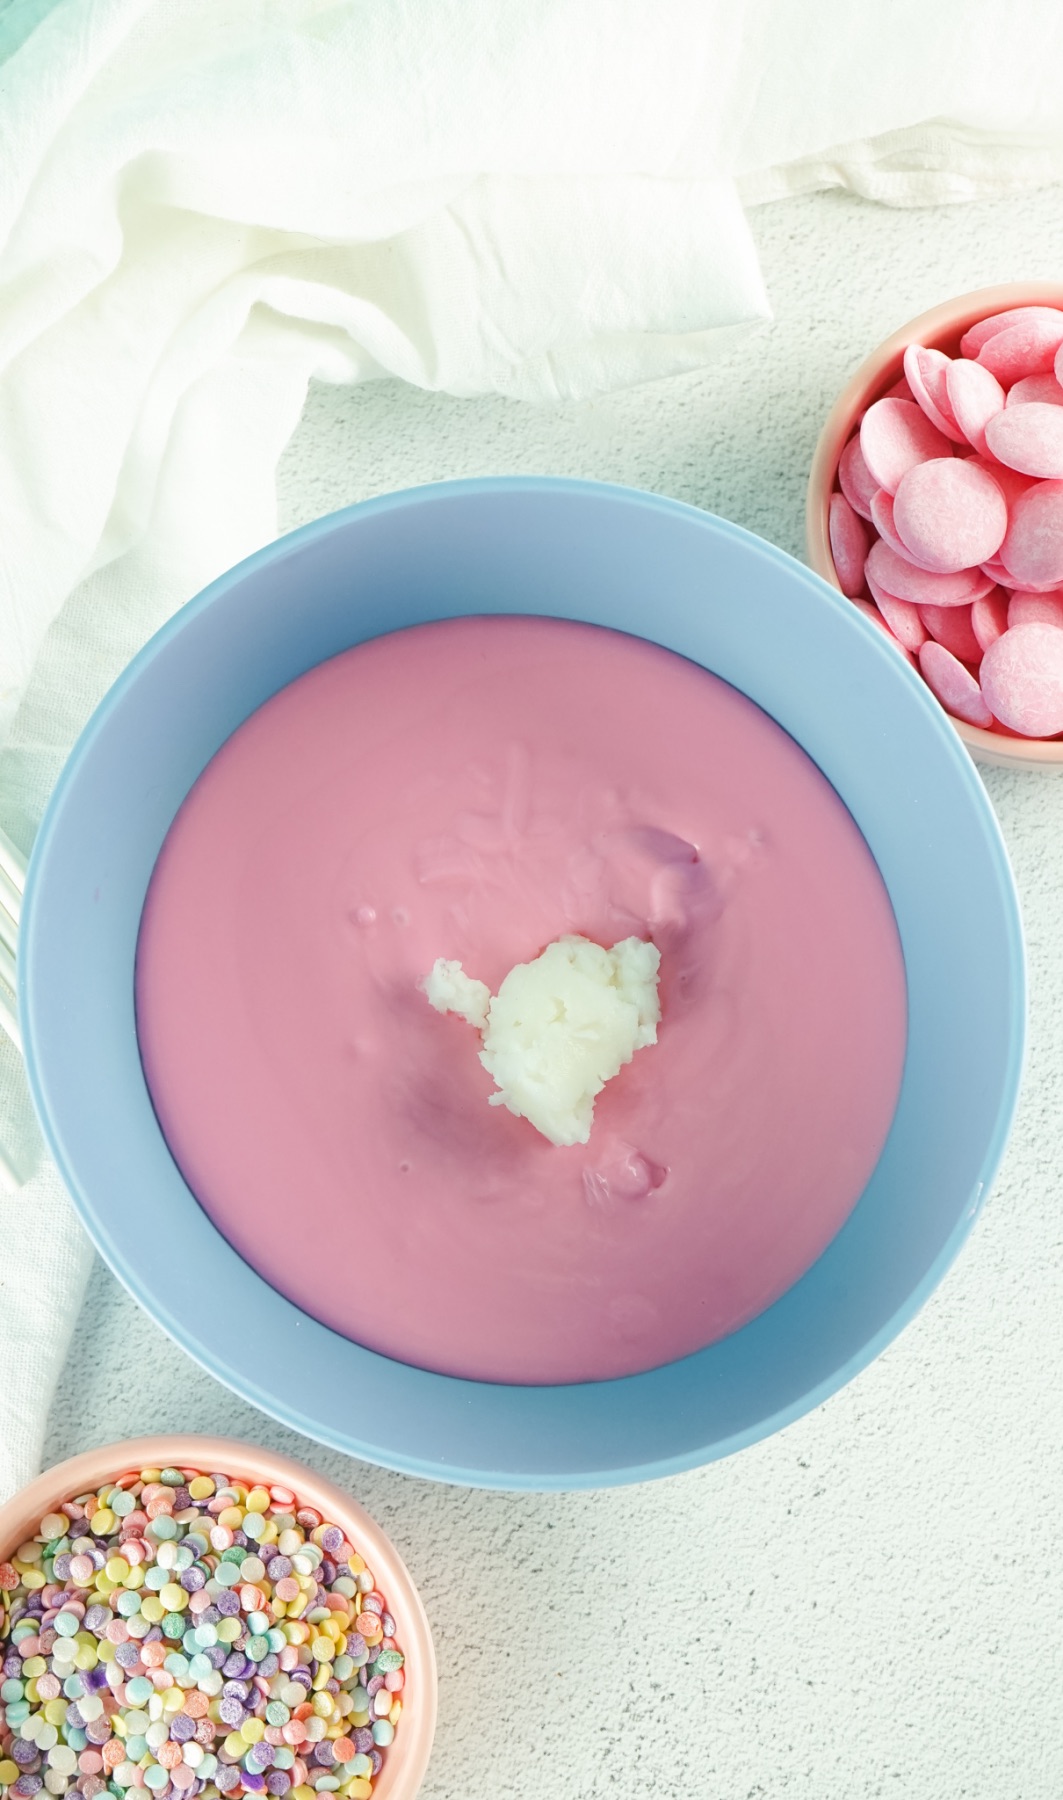
Start with melting just a tiny bit of your pink chocolate. Don’t melt the whole batch until later. But I’m going to tell you how to do the hole process now. With this pink chocolate we’re going to do something a little different than the normal way to temper chocolate. Instead, we’re going to add a touch of coconut oil.
The coconut oil will make the chocolate on the outside of the Oreo a little bit thinner and a little glossier too. The trick is you can’t add too much coconut oil or your chocolate won’t set. So be careful with the recipe.
Here is the full tutorial on tempering white chocolate, but the basics are add about 2/3 of your total chocolate to a microwave safe bowl with your coconut oil and microwave for 30 second intervals. After each round of heating, stir the chocolate thoroughly and completely. When it’s completely melted, add your leftover 1/3 dry chocolate in small amounts. Stir the dry chocolate into the liquid chocolate until the dry chocolate quits melting.
Again, remember, just start with a tiny amount for the next step.
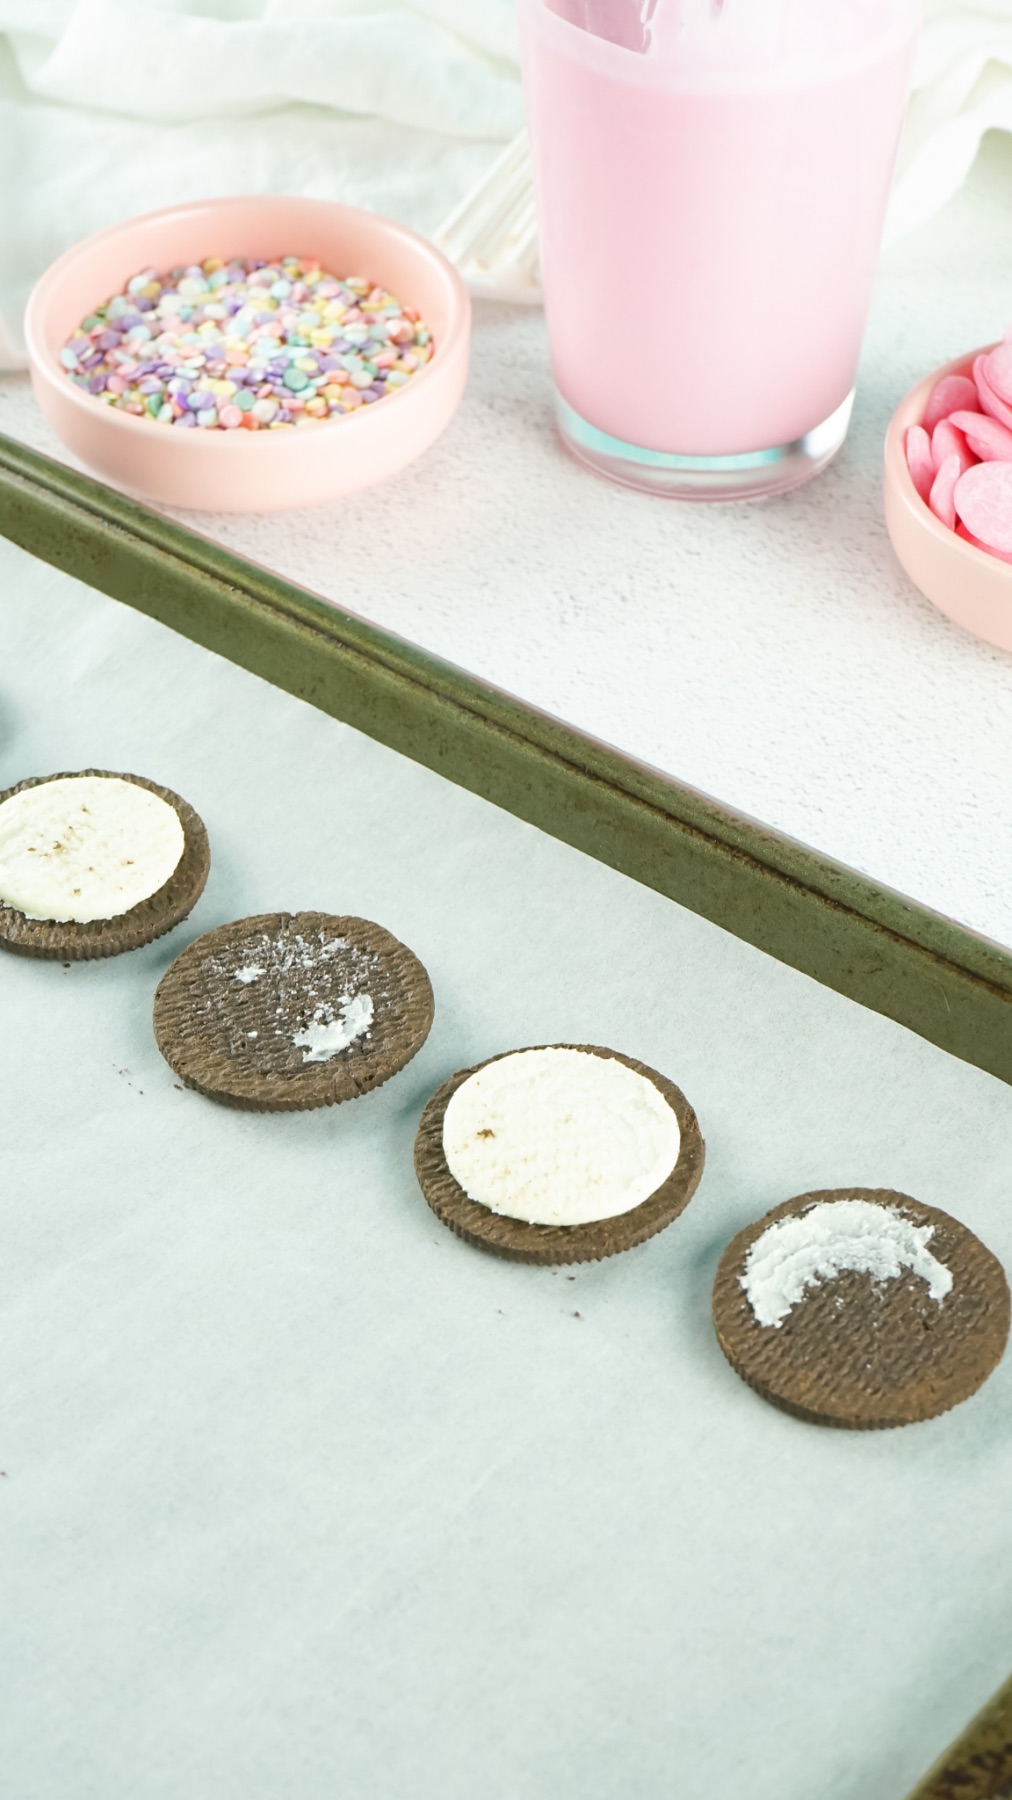
How to Open Oreos
The easiest way to open Oreos is to twist one circle towards you and one circle away from you gently, until the frosting gives and the cookies part.
But it’s easy to break cookies along the way. Just expect that it’s a part of the process. If the cookies are room temperature or even slightly warm, it will make the frosting softer and easier to split the cookies. Additionally, Double Stuff or any Oreos with more frosting are easier to split than Oreos that have less frosting.

Adding the Stick to the Center of the Oreo
To add your lollipop stick to the Oreo, you will need to place it inside the Oreo. And the Oreo will need to hold in place on the stick.
The best way is to dip the tip of your lollipop stick in your melted chocolate and place it in the center of the Oreo. Gently press the stick into the frosting and close the Oreo sealing the stick inside.
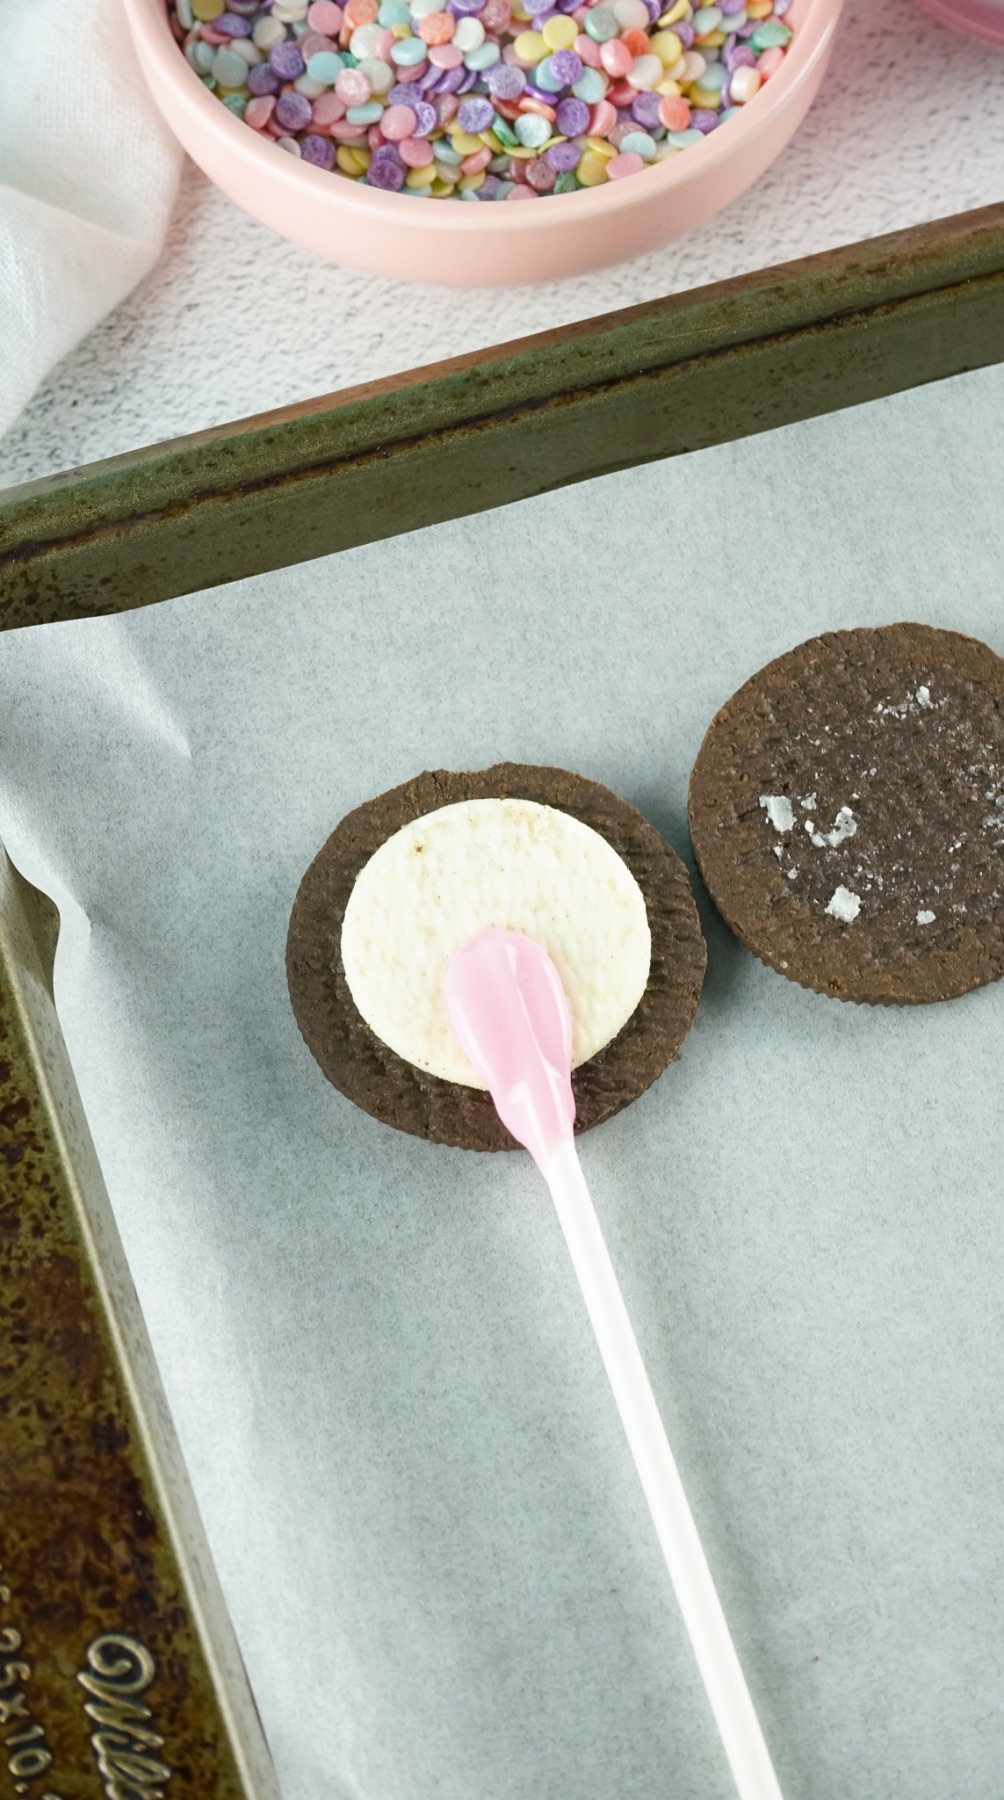
How Long Should You Let the Sticks Set
Allow the chocolate to dry completely before moving on to the next step. Any chocolate will take around 20 minutes to harden. That’s why I mentioned to only melt a tiny amount and to wait until later to melt the rest.
It’s okay if you already have the whole batch of chocolate ready to go. You can remelt the chocolate if needed, just be careful to “seed” the chocolate every time so that your chocolate will harden correctly. Seeding the chocolate is when you add the dry chocolate to the melted, and stir it thoroughly until the chocolate doesn’t melt anymore.
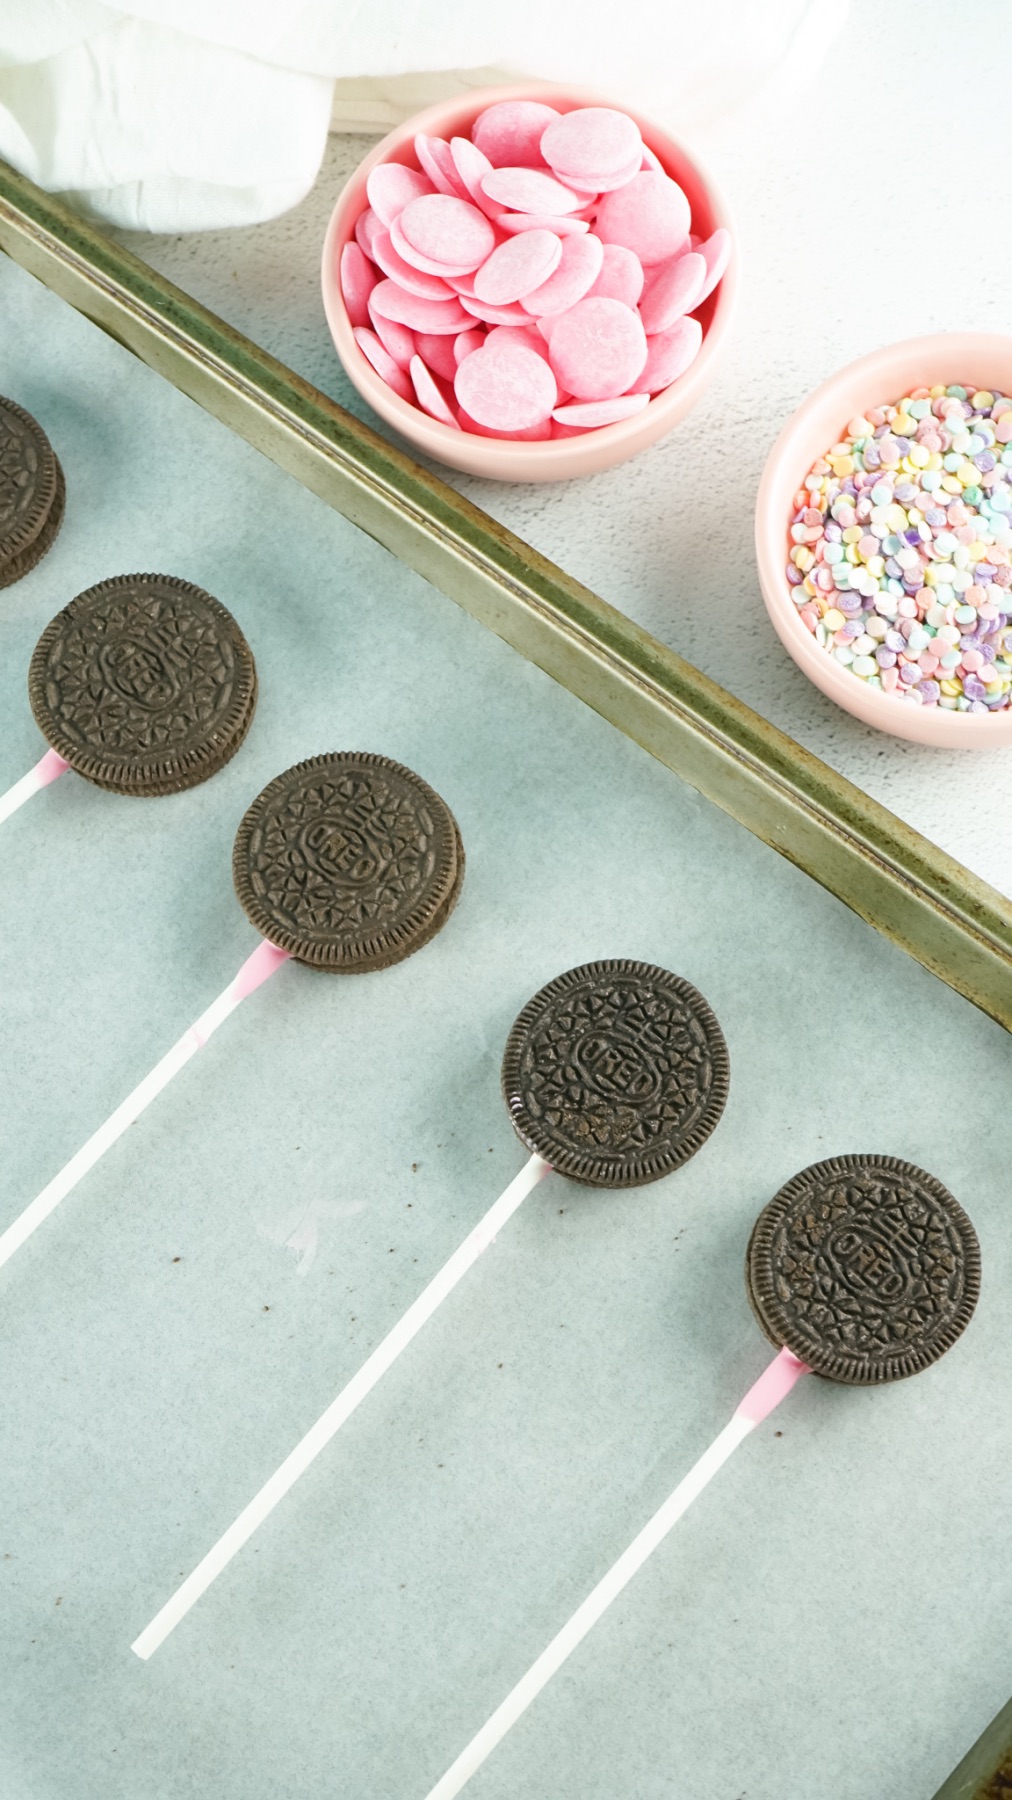
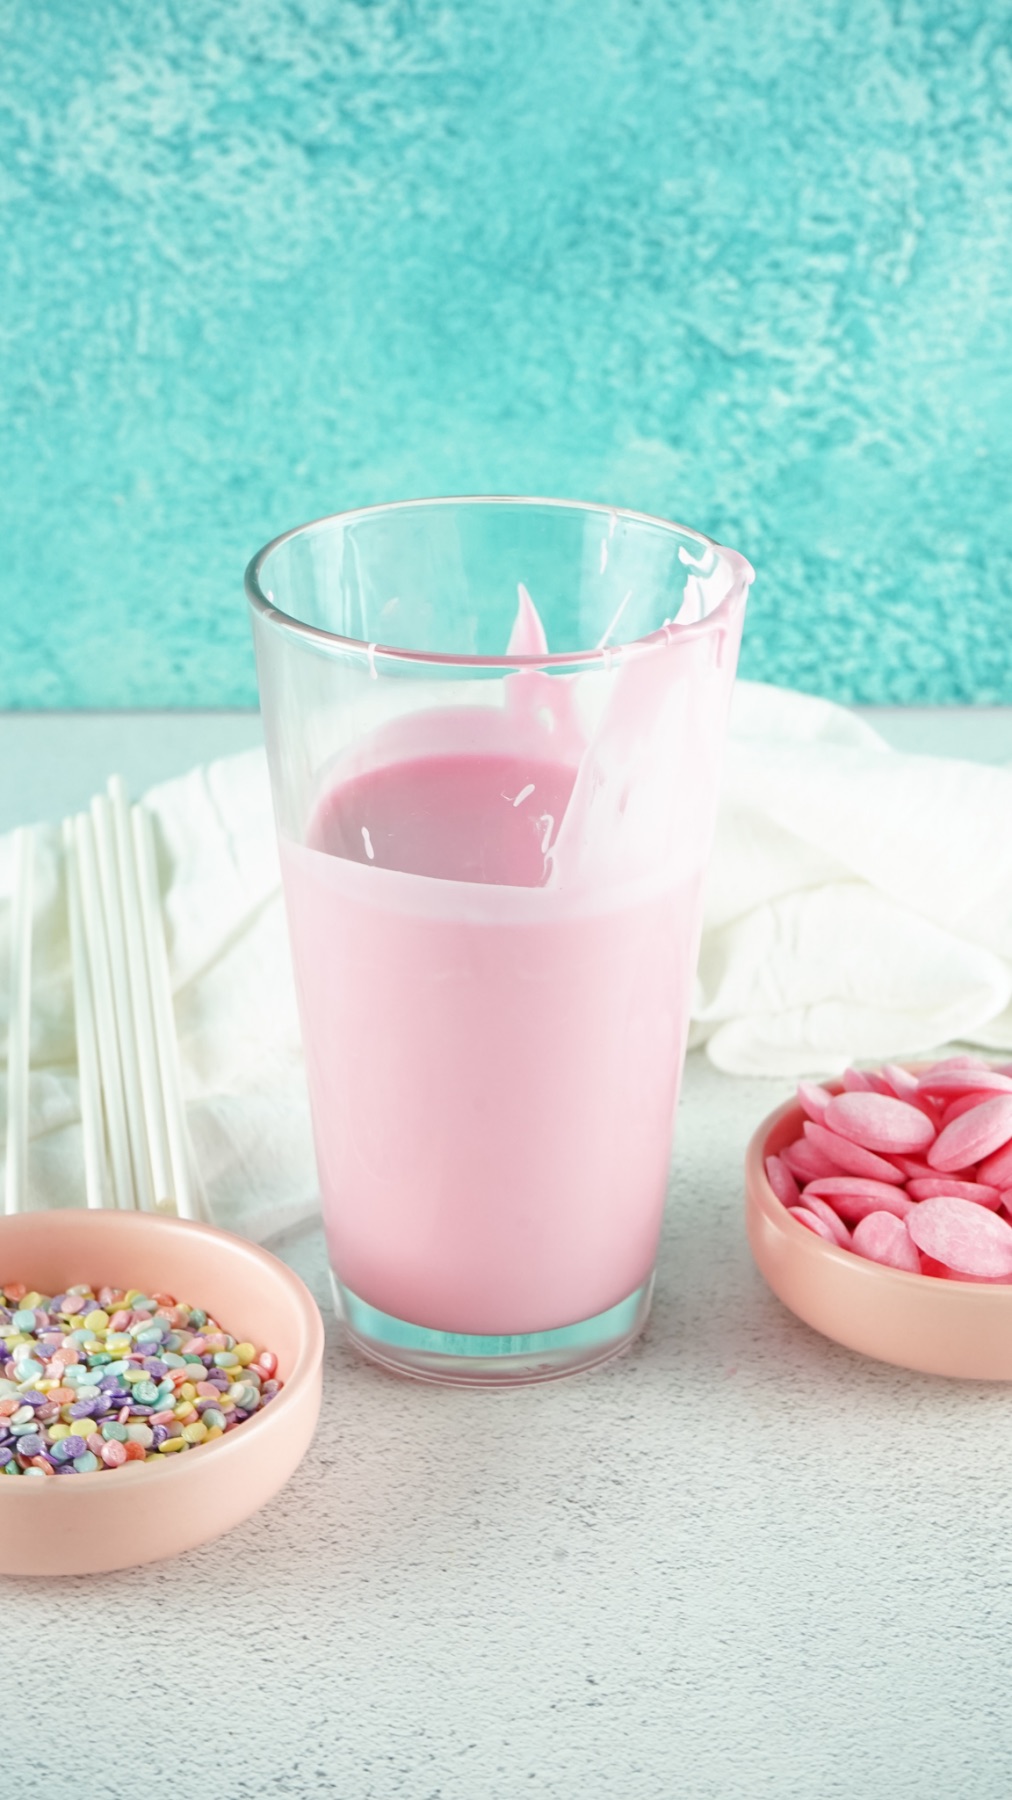
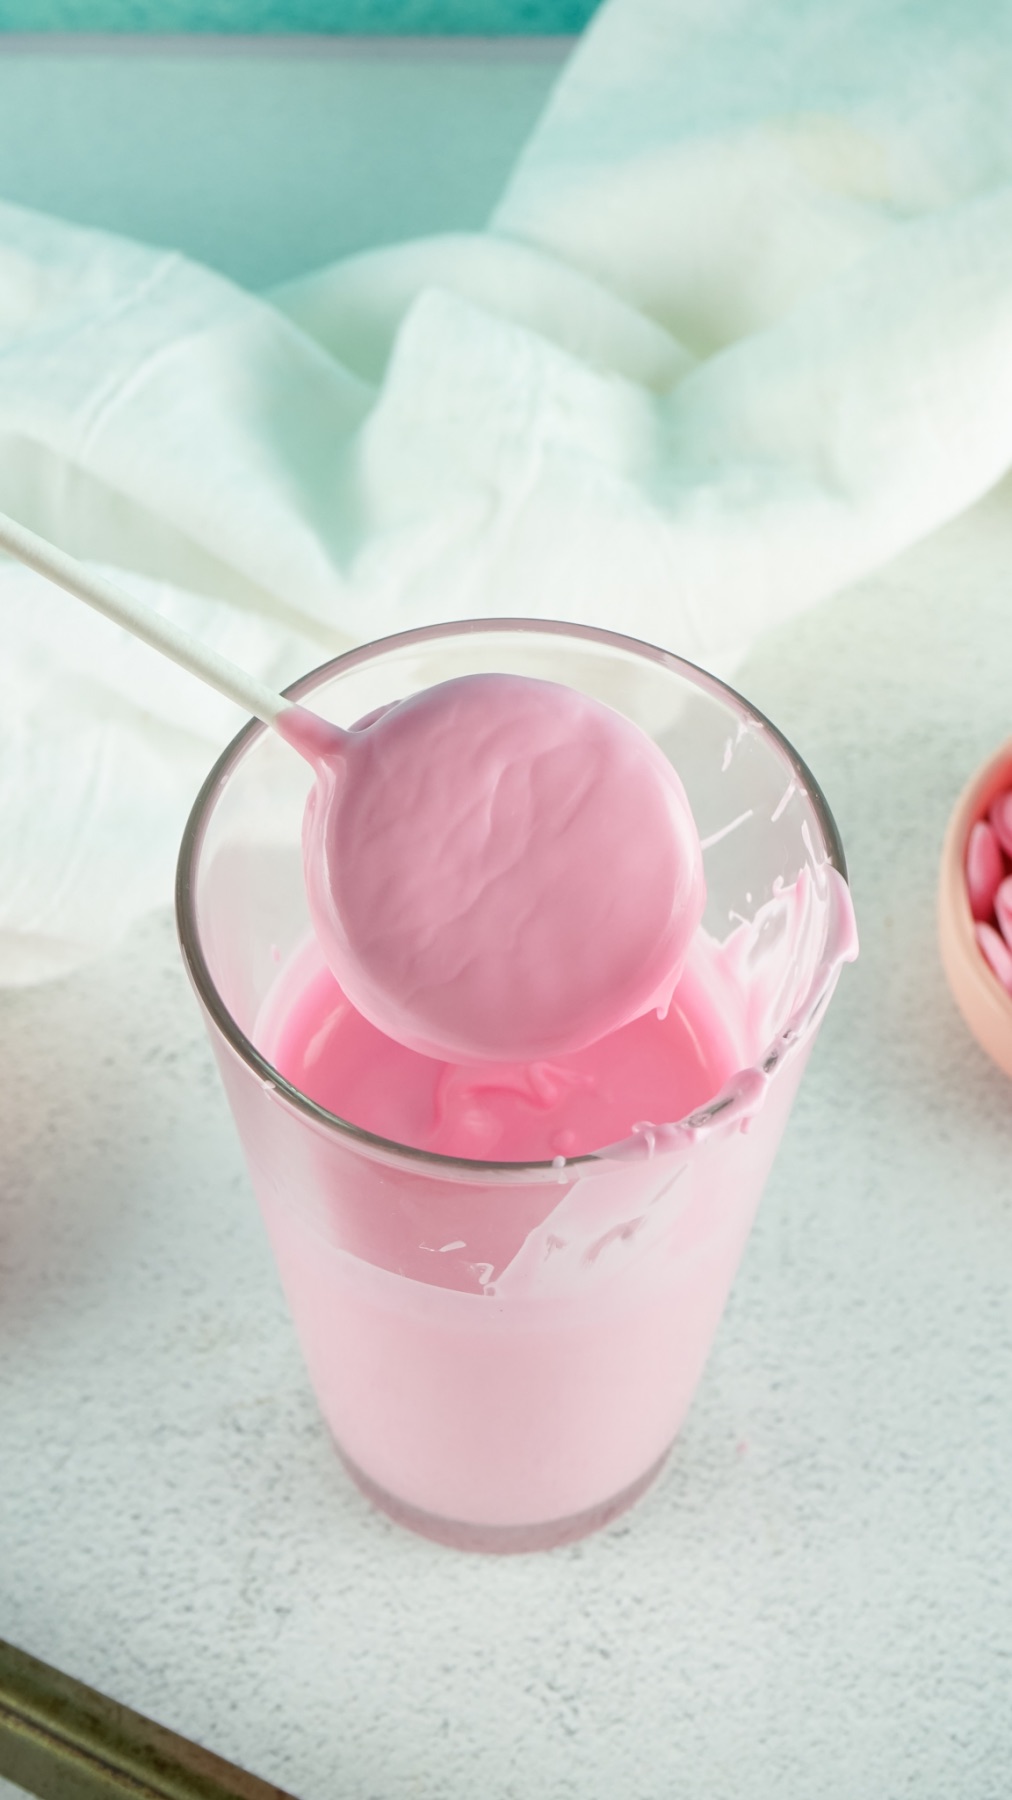
Dipping the Oreo
Once your full batch of chocolate is ready, pour it into a tall glass that’s wide enough for an Oreo. Be sure that there’s enough room on the top to be able to dip the Oreo.
Dip the Oreo in the chocolate until it’s completely coated. Be mindful of the stick – you don’t want too much chocolate along the stick so that they look cute.

Once your cookie is completely coated, tap it on the side of the glass to remove any excess. Place the Oreo pop on a parchment sheet.
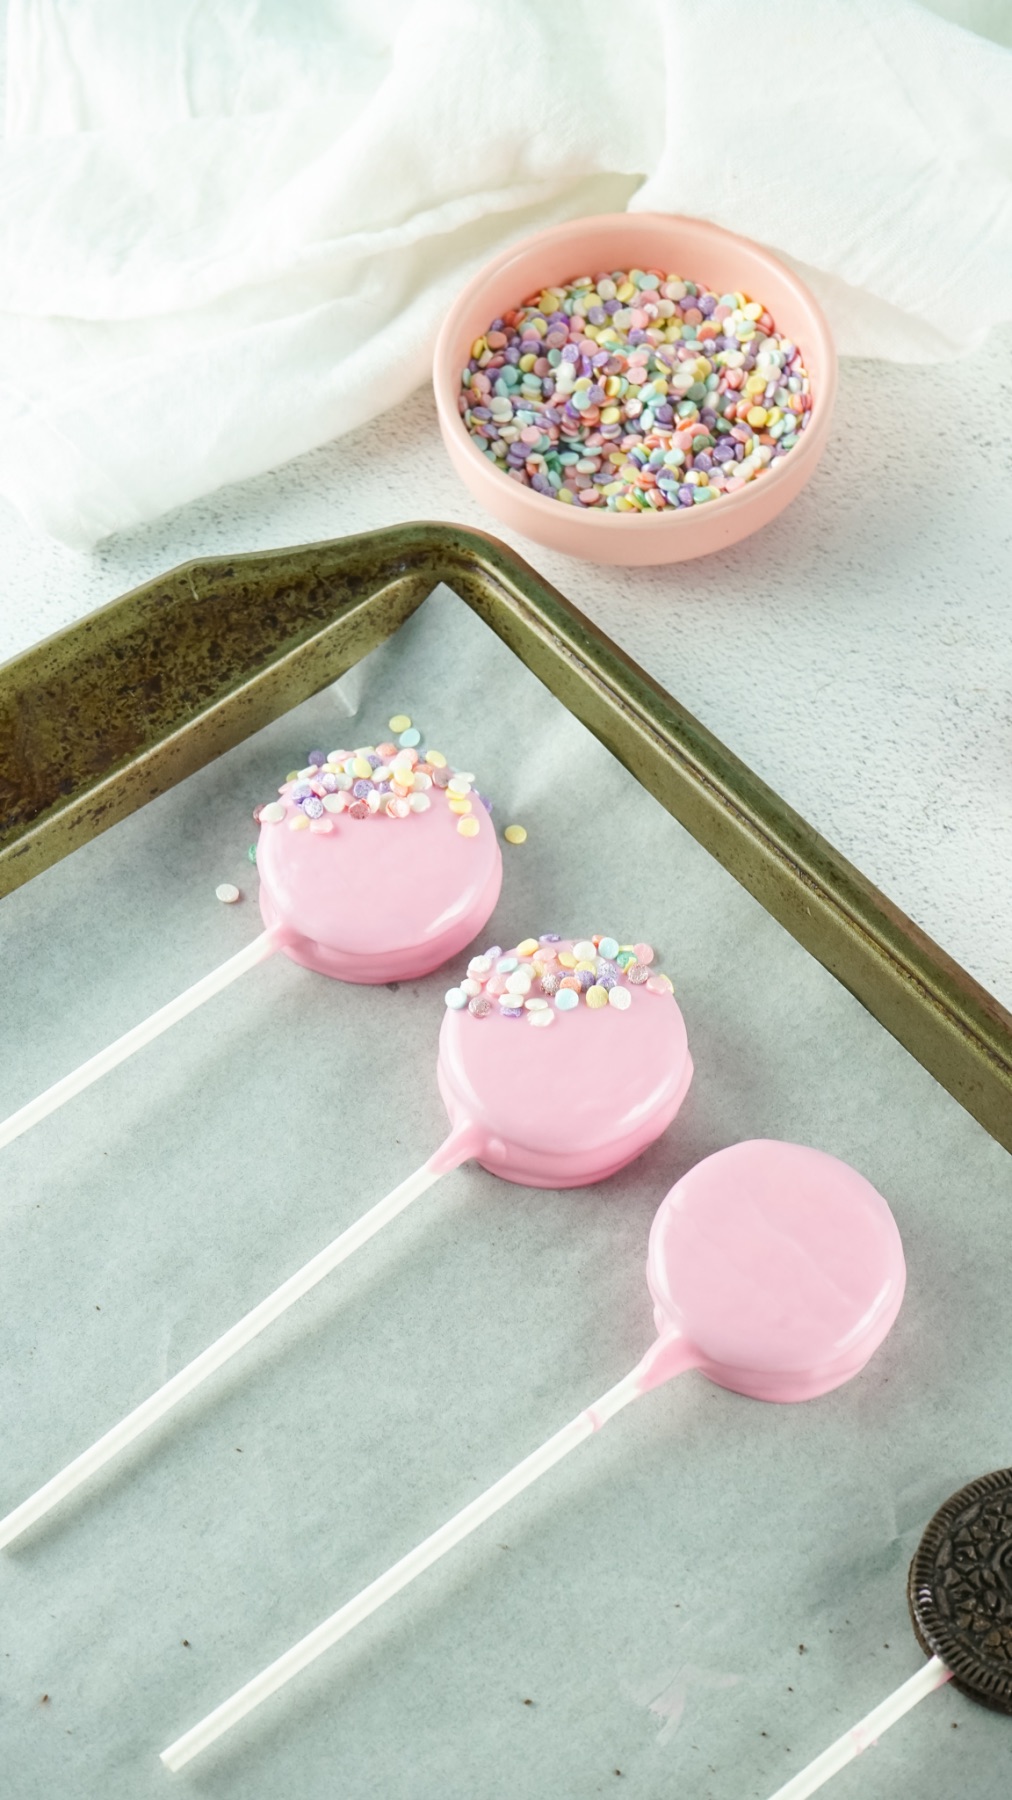
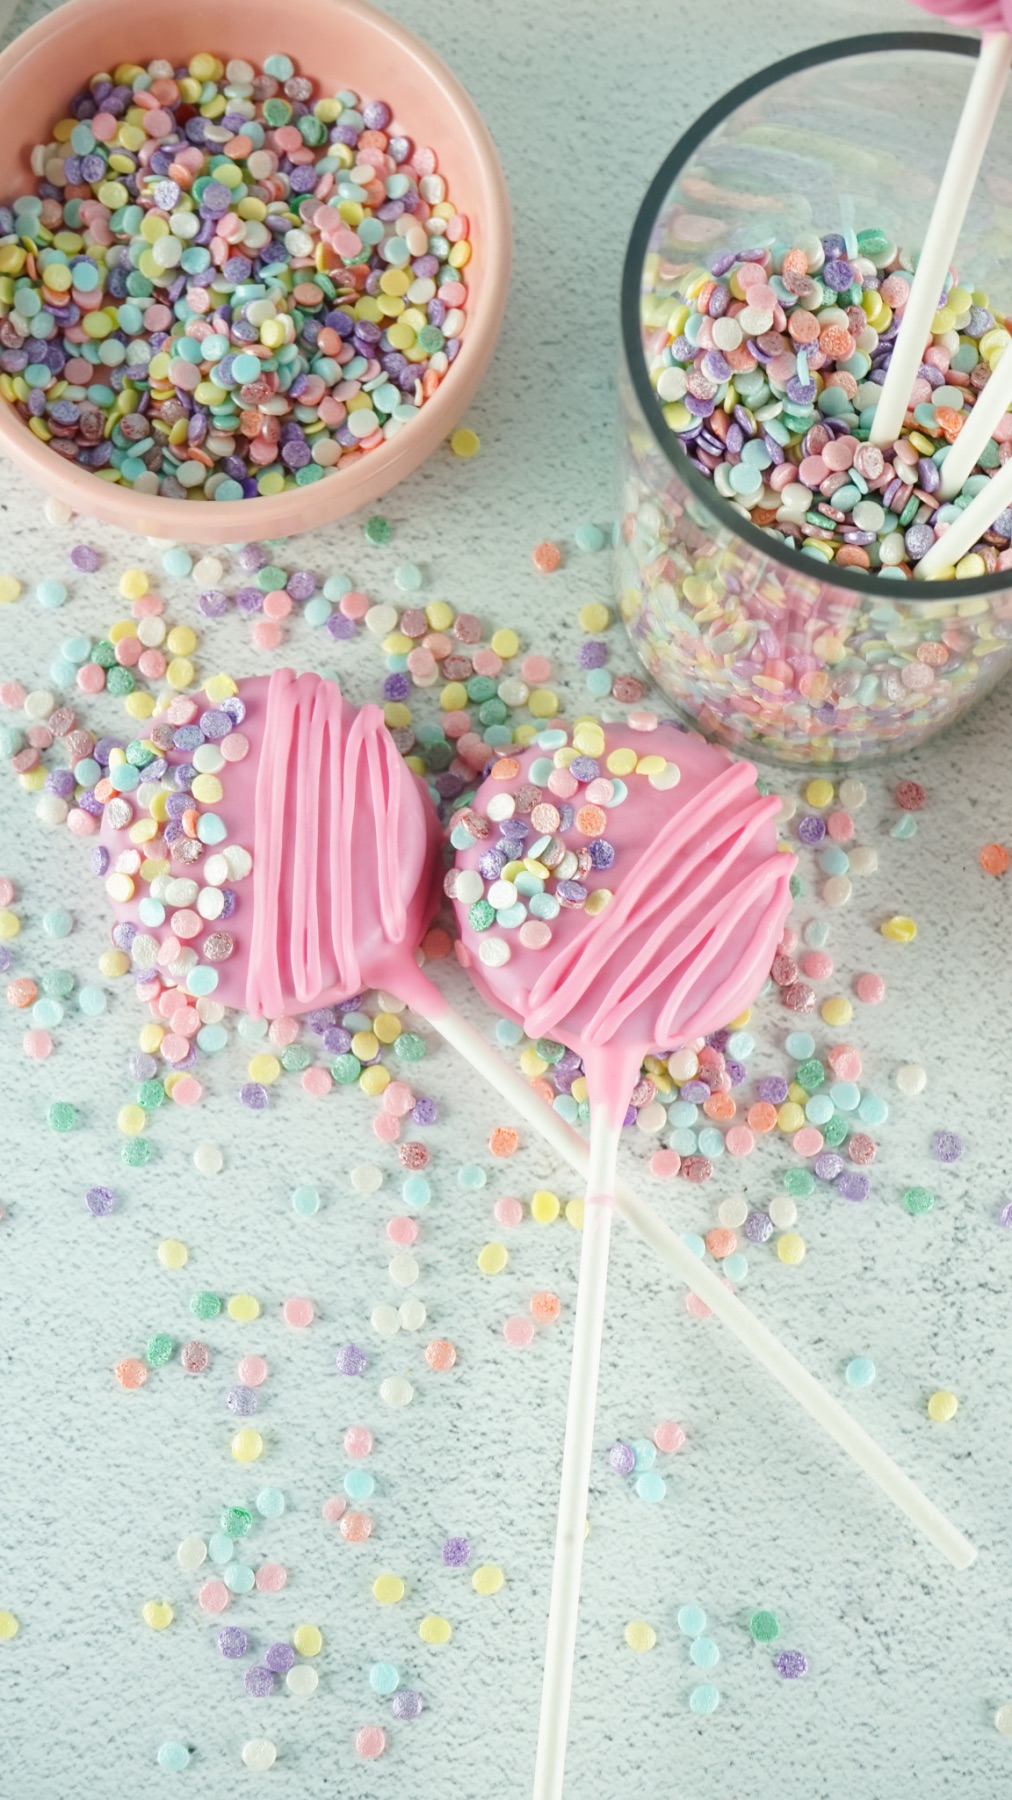
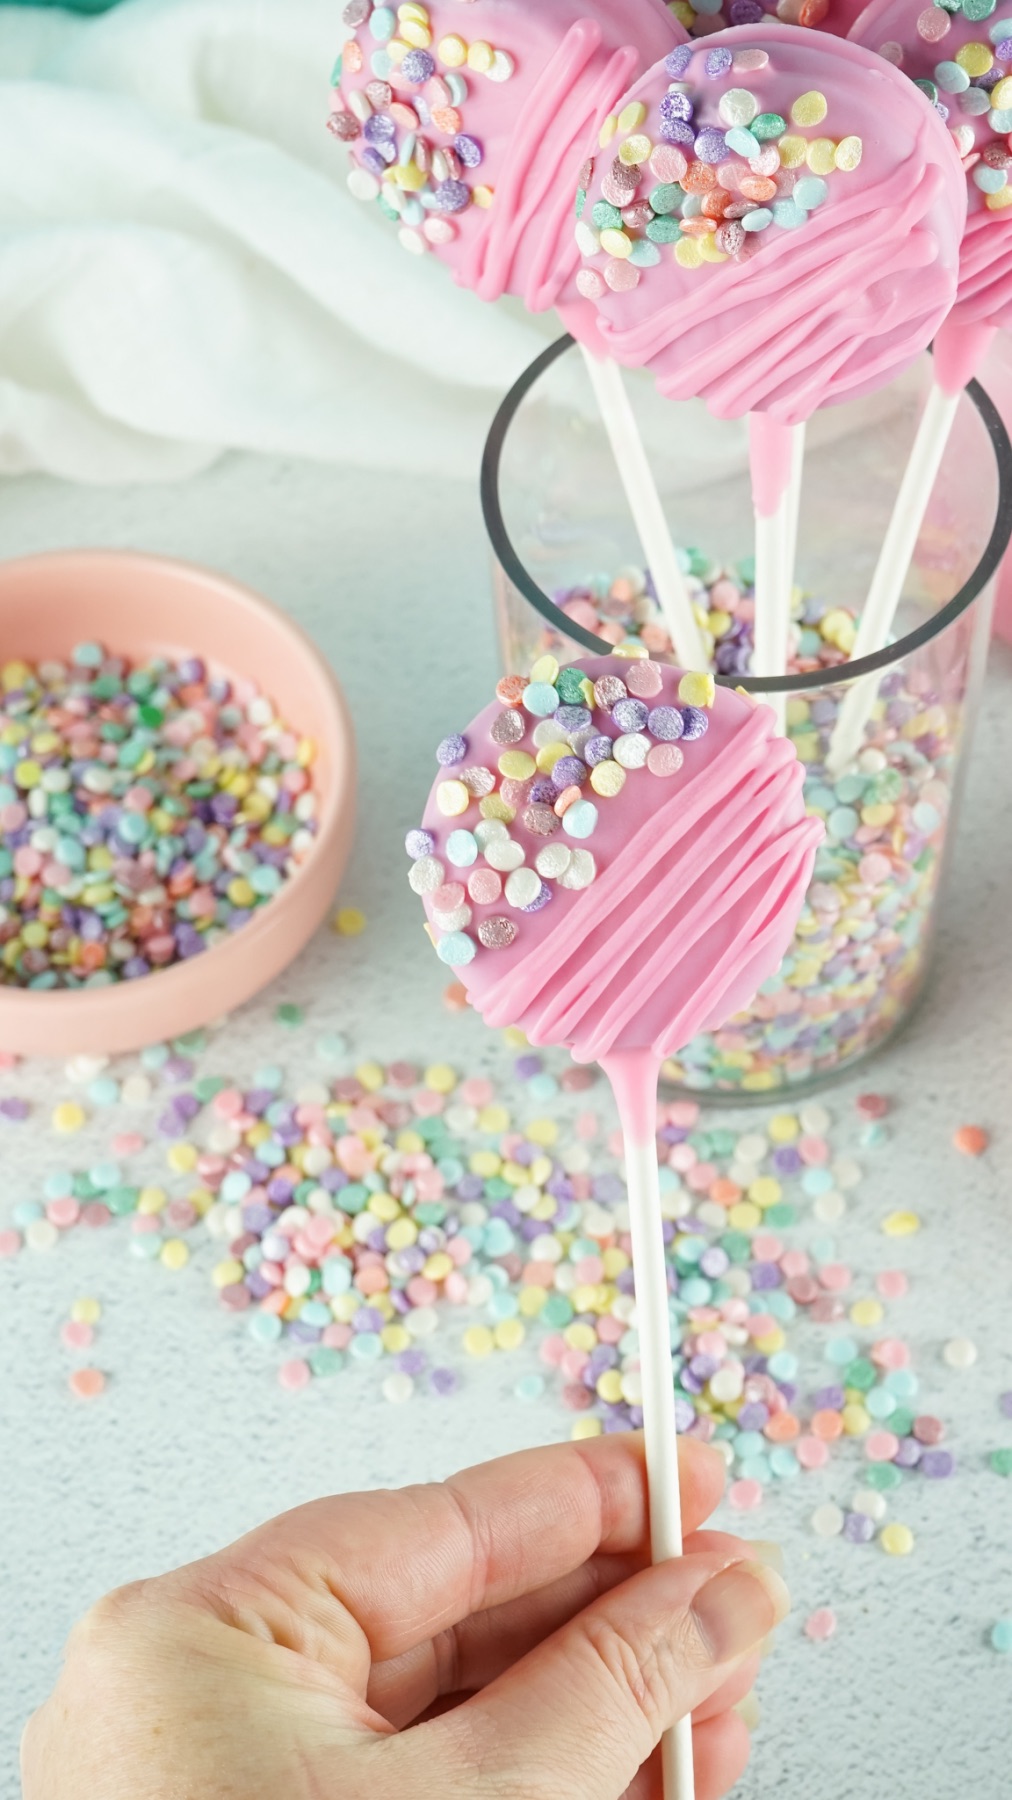
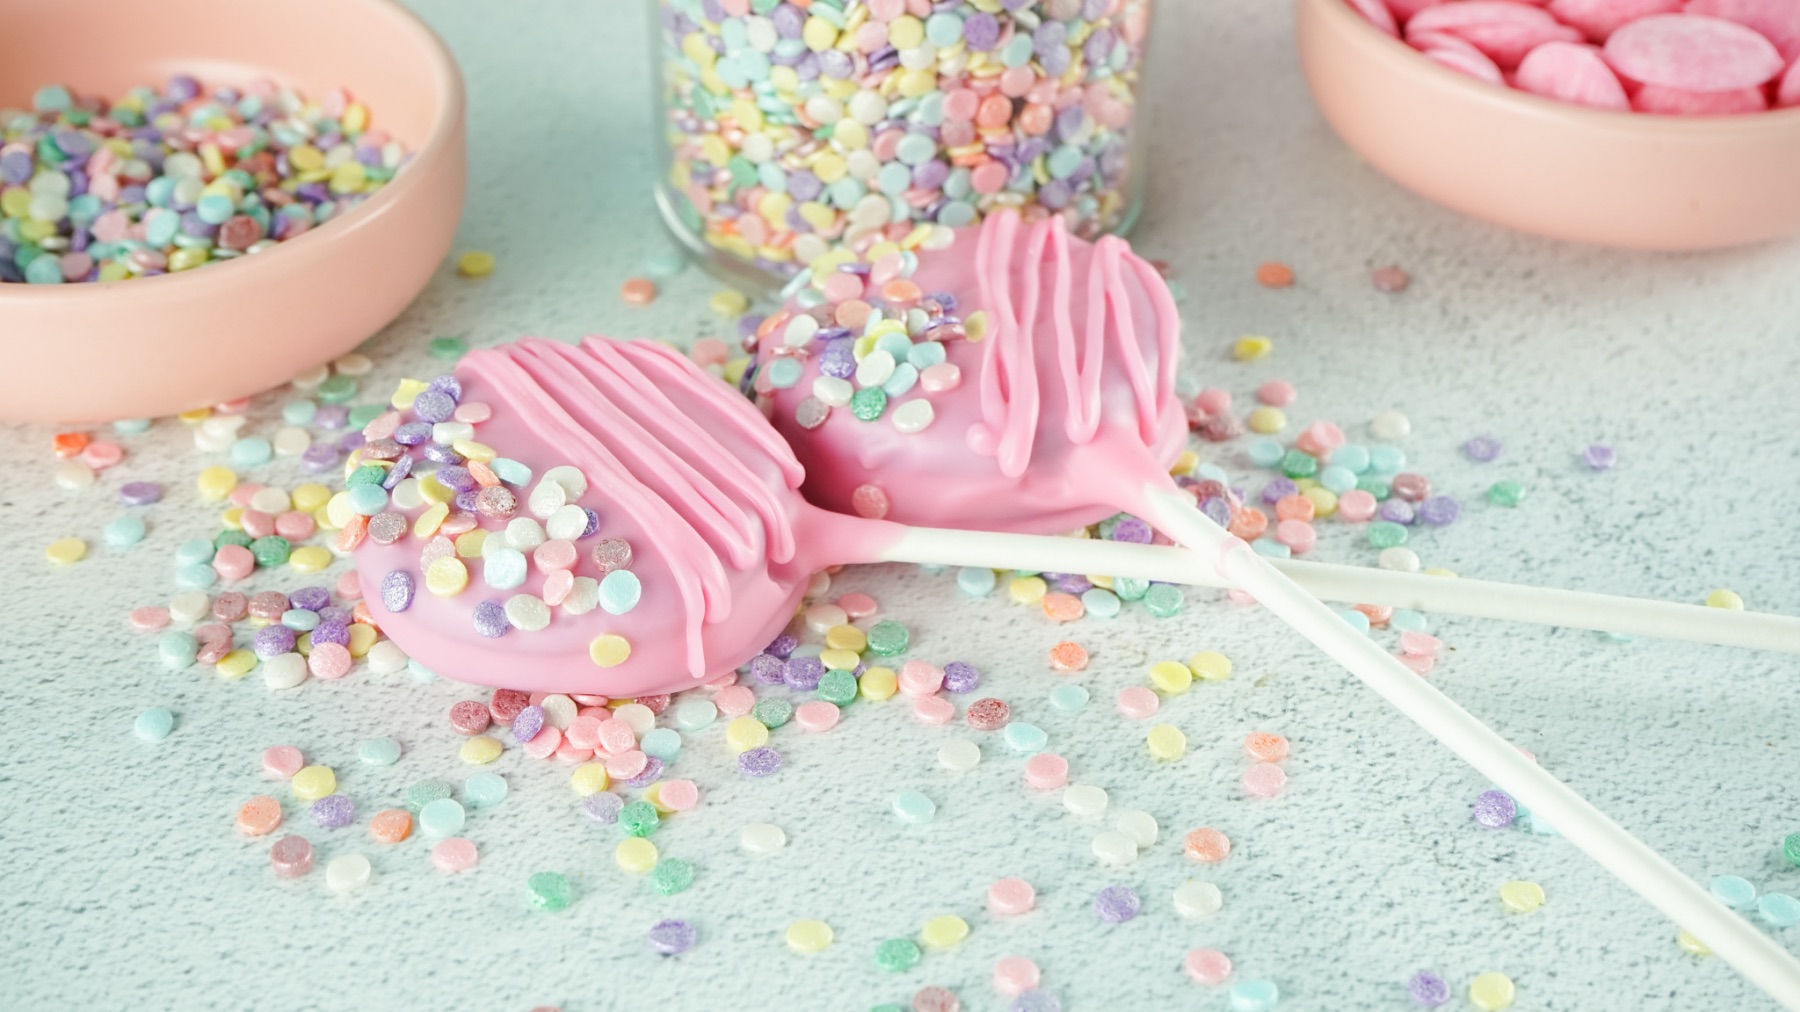
Dipping and adding sprinkles has to be done quickly. So after each time you coat an Oreo in chocolate and place it on the parchment, add the sprinkles. Then dip another cookie, back and forth until all your Oreo pops are sprinkled.
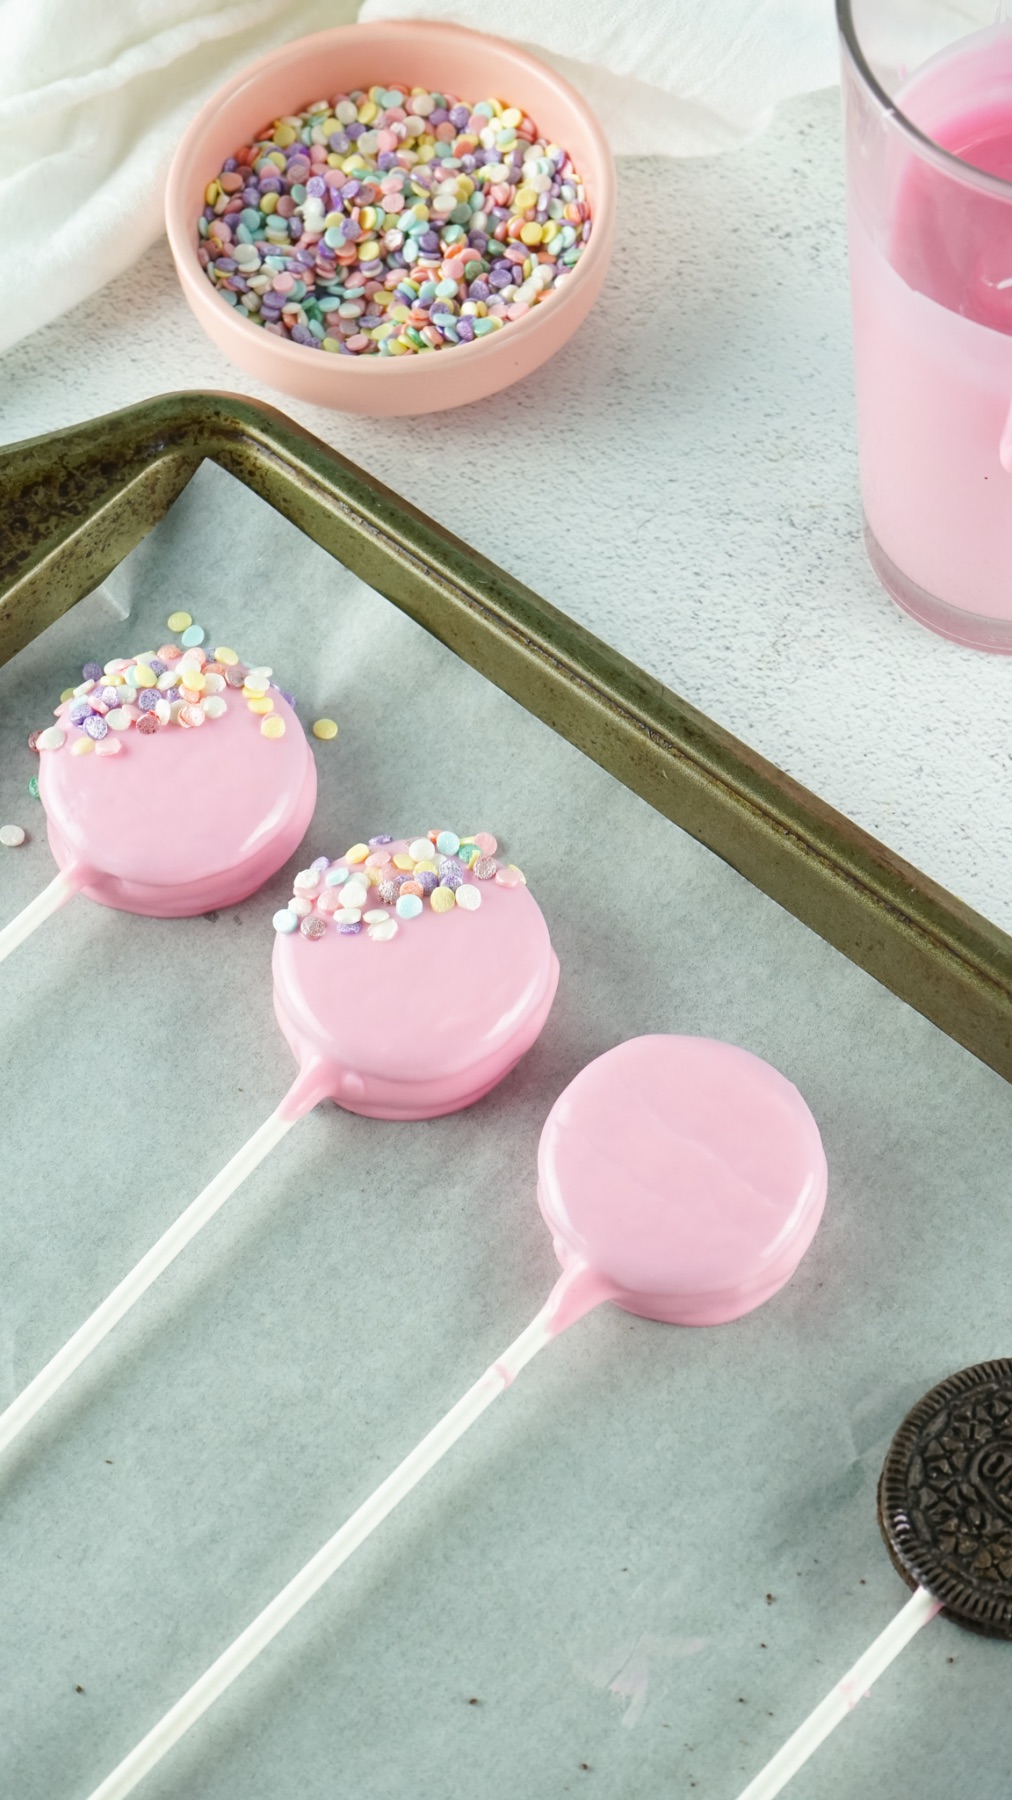
Adding the Sprinkles
The reason you need to add the sprinkles quickly is that you need your chocolate to be melted so they adhere.
For my sprinkles, I added them just in the upper corners. Make a pattern of where you want your sprinkles to be placed. I don’t recommend covering the entire cookie – just pick a small spot and use a small amount of sprinkles.
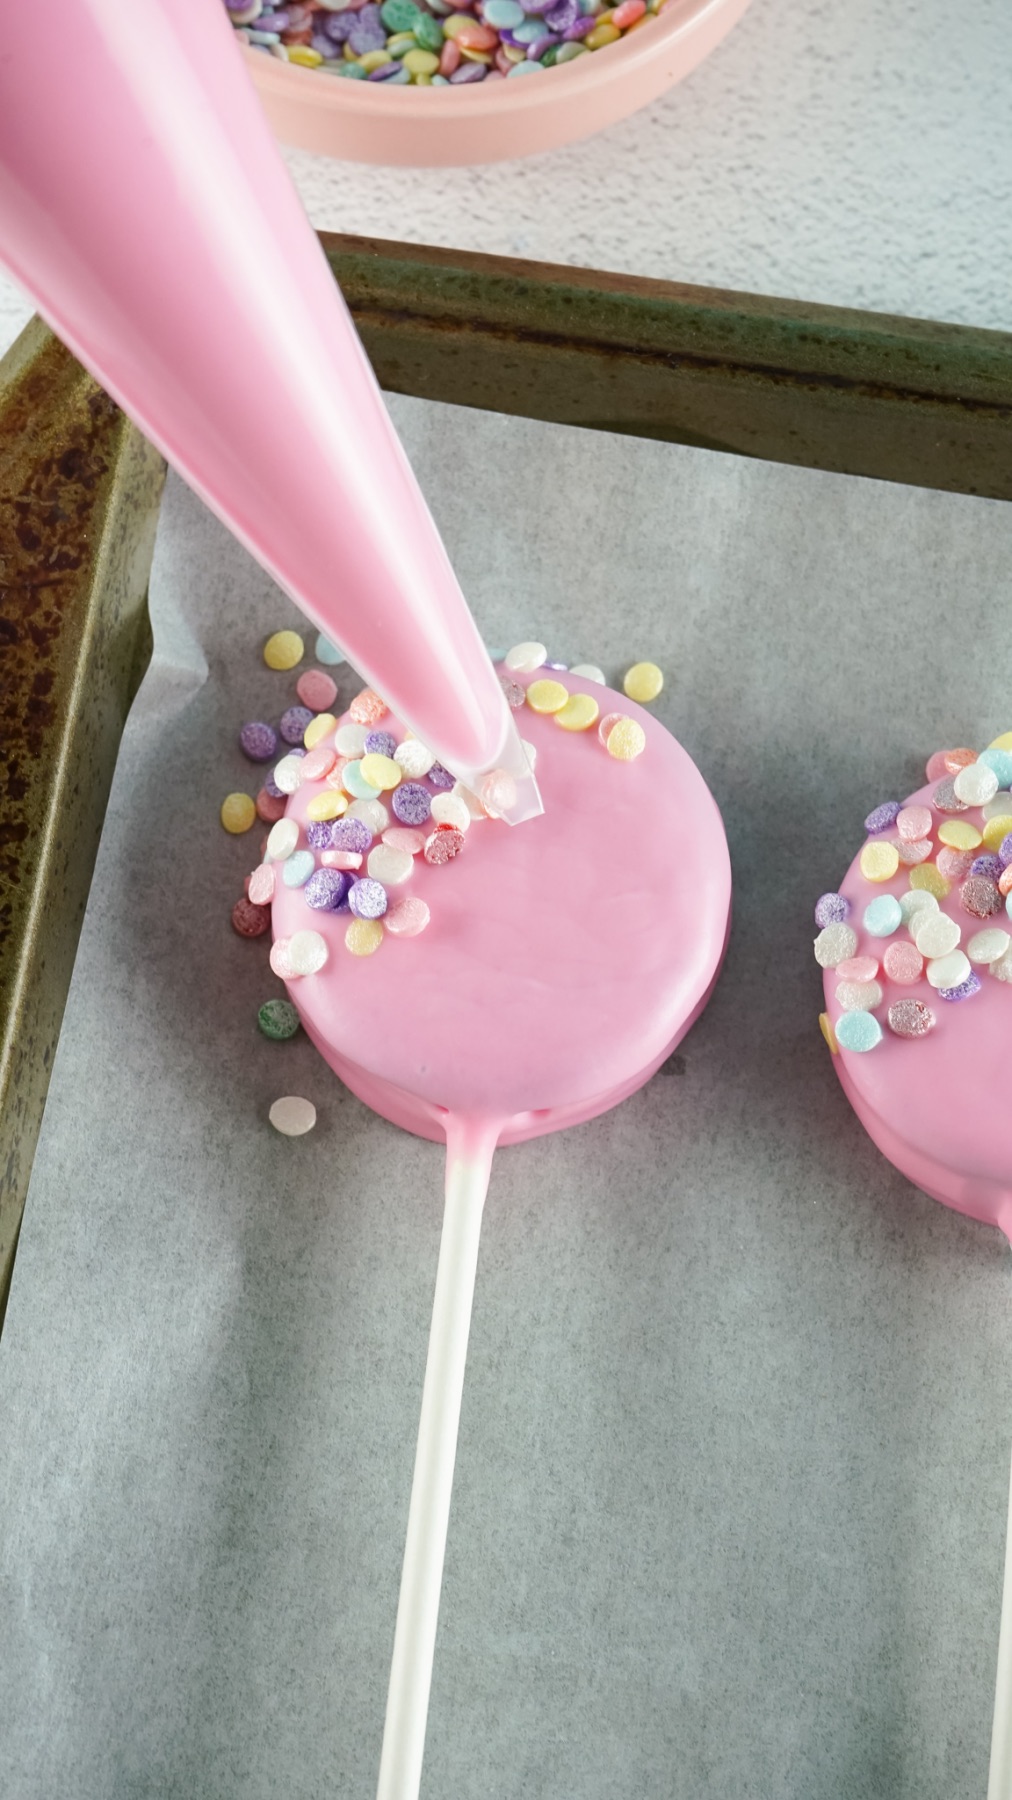
Use a Piece of Paper to Create an Edge
If your sprinkles are just going everywhere and look messy, use a sheet of paper to block out the areas you don’t want the sprinkles to go. Don’t let the paper touch the melted chocolate, hover the paper just an inch above the Oreo, and use your other hand to place the sprinkles.
Add a Zig Zag of Chocolate
Once your sprinkles are placed, add the rest of your pink chocolate to a piping bag. Cut a tiny end from the piping bag to make thin zig zag shapes across the lower right of the cookie.

Your hands will likely keep the chocolate liquid enough to make your stripes, but you can always remelt the chocolate in your microwave safe bowl if needed.
Let the Oreo Cookie Pops Set
Once you’ve added your chocolate zig zags, you are done! Now just let the cookie pops set. Even if you are used to letting chocolate set in the fridge or freezer, don’t with these cookie pops.

It doesn’t work as well because of the cookie and chocolate together. Instead, just let them set on the counter at room temperature. It doesn’t take long!

How to Serve Your Chocolate Covered Oreo Pops
These cookie pops are perfect for a display! Add them to a decorative glass or even top a cake with them!
You can also bag them in individual cello bags and tie them closed with twist ties to give them out to your co-workers or to a classroom.
How to Store Chocolate Covered Oreo Pops
Cello bags are great because they also make a great way to store these cookie pops. If you don’t have cello bags, just use an air tight storage container like a Pyrex or a Gladware container.
They will keep for up to around 2 weeks depending on how hot and humid your area gets. But my guess is they won’t last that long!

I mean they’re so cute, how can they not get eaten fast? Ready to make these cookie pops? Show us what you make in the comments or by tagging us on social!

Let’s Stay Friends!
Insta | Pinterest | Enews | TikTok
